
Essential Guide to Garage Door Sensor Installation
Learn the essential steps for garage door sensor installation in Los Angeles. Ensure your home safety, comply with regulations, and prevent accidents with our guide.
Essential Guide to Garage Door Sensor Installation
Welcome to your definitive resource on garage door sensor installation for Los Angeles homeowners. As the primary point of entry for many California homes, your garage door operates under significant tension and force. Ensuring that your safety sensors are installed correctly is not just a suggestion; it is a critical safety requirement that protects your family, pets, and vehicles. At MSB Garage Door Repair, we have spent years addressing the unique climate and usage patterns of the LA area. Whether you are upgrading your system or conducting a DIY repair, understanding the mechanics of these sensors is vital for long-term home security.
Understanding Garage Door Safety Sensors
Garage door safety sensors, often referred to as photo eyes, are the unsung heroes of your home infrastructure. Since federal regulations mandated their use in 1993, these devices have significantly reduced injury rates. They function by shooting an invisible infrared beam across the path of the garage door. When this path is obstructed by a person or object, the sensor sends a signal to the motor unit to immediately reverse the door.
Why Sensors Are Critical in Los Angeles
In a bustling city like Los Angeles, garage doors are used dozens of times daily. Between high temperatures that can affect circuit boards and the salt air near the coast that promotes corrosion, local sensors face unique environmental stressors. Proper installation ensures that your system complies with UL 325 safety standards, which are strictly enforced for all residential Garage Door Installation projects.
The Importance of Proper Installation
Installing sensors correctly is about more than just checking a box; it is about guaranteeing that your opener system has the integrity to function during an emergency. Properly placed sensors ensure the beam is never interrupted by stray shadows but is always sensitive enough to detect small obstructions like a bicycle or a child's toy. Neglecting this part of your Opener Installation can leave your home vulnerable to property damage or accidents.
- Accident Prevention: Stops a heavy door from closing on vulnerable targets.
- Liability Protection: Proper safety features prevent potential legal issues for homeowners.
- Regulatory Compliance: Ensures your property remains up to current municipal safety codes.
- System Longevity: Prevents the garage door opener motor from putting unnecessary strain on the door when it hits an obstacle.
Pro-tip: Always use a high-quality bubble level when mounting your sensors. Even a half-inch vertical discrepancy can cause the system to default to a safety mode, preventing the door from closing entirely.
Step-by-Step Installation Process
Before beginning, clear your workspace and ensure you have the correct tools: a power drill, a level, wire strippers, and high-quality insulated staples. Disconnect the power from your motor unit to prevent accidental triggering.
1. Positioning and Mounting
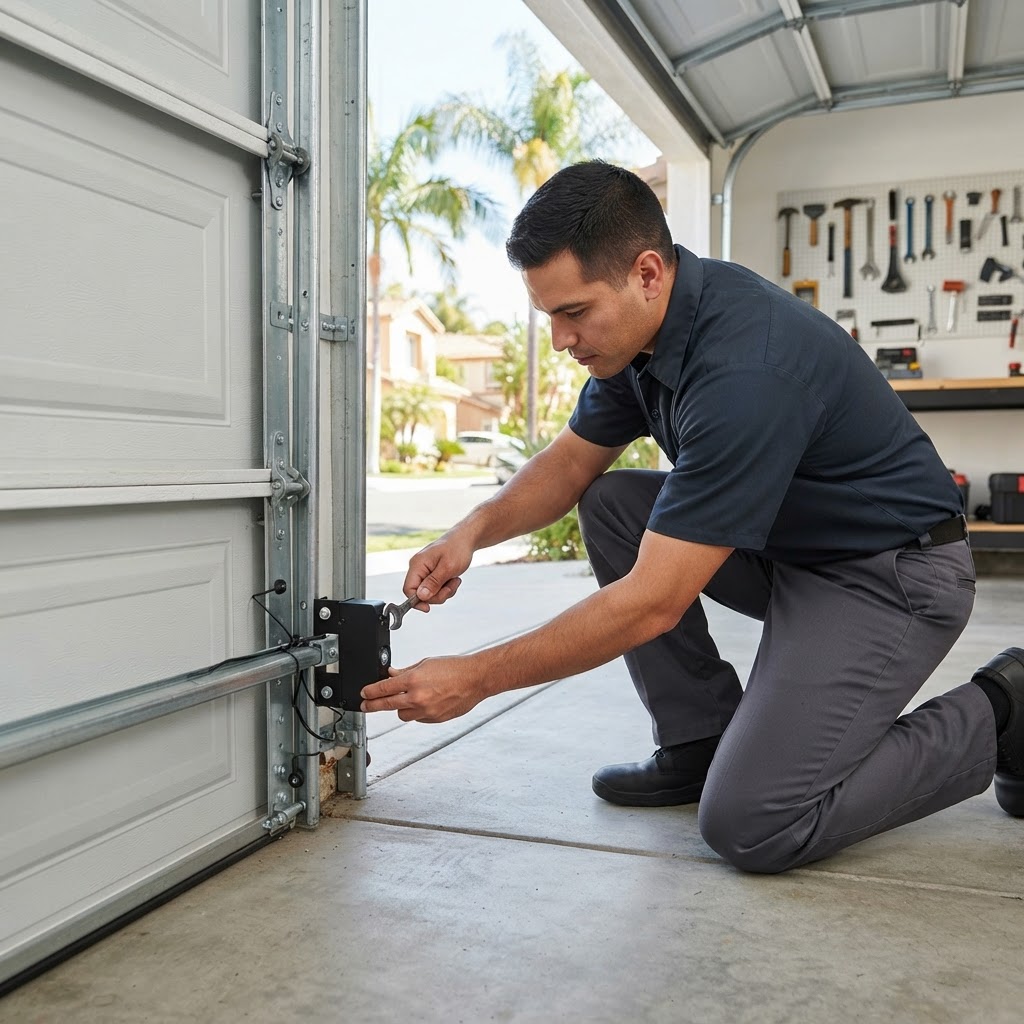
Mount the sensors exactly 6 inches above the garage floor. Anything higher creates a dangerous gap underneath the door. Use your level to ensure both the transmitter and receiver are perfectly aligned on the horizontal axis.
2. Wiring and Connectivity
Run the wires along the track or wall, securing them with insulated staples every 12 inches to prevent sagging. Connect the wires to the designated terminal on your opener. If you are experiencing persistent connection issues, it may be time to schedule a Safety Inspections visit to ensure your wiring infrastructure is secure.
3. The Calibration Test
Once power is restored, perform the obstruction test. Place a 2-by-4 piece of lumber in the path of the door. The door should contact the object and immediately retract. If it continues to move, stop immediately and contact a professional.
Troubleshooting Common Sensor Failures
Even with perfect installation, Los Angeles environmental factors often cause issues. Dust from local construction or moisture from rain can cloud the lenses. Regularly inspect the LED indicators on the sensors. A solid glow usually indicates proper alignment, while a flickering or off light suggests a misalignment or wiring fault.
Common DIY Fixes
- Cleaning the Lens: Use a dry microfiber cloth to wipe the lens, avoiding harsh chemicals.
- Realignment: Gently pivot the bracket until the beam is clear.
- Wire Inspection: Look for bite marks from rodents or fraying caused by heat exposure.
When to Call a Professional
Some problems, such as a dead motor board or internal wiring failure, require specialized expertise. If you find that your sensors are functional but the door continues to reverse without cause, you may need a professional Garage Door Repair. Dealing with electrical components can be dangerous, and attempting complex repairs without proper training can void manufacturer warranties. If your system is old or showing signs of wear, we also offer Emergency Repairs to secure your home.
For all your residential garage door needs, trust the local experts at MSB Garage Door Repair. We provide prompt service throughout the Los Angeles area, ensuring your sensors are aligned, tested, and ready for daily use. Do not put your safety at risk with faulty equipment. Call us today at (818) 650-7697 or Book a Service online to schedule a comprehensive safety check for your property.
Optimizing Sensor Performance for Los Angeles Microclimates
Los Angeles geography presents unique challenges for garage door technology. Properties located near the coast often experience high salt air concentration which accelerates the oxidation of wiring terminals and internal sensor contacts. In the San Fernando Valley or Inland Empire, extreme heat cycles can cause the plastic housing of sensors to become brittle or lead to thermal expansion of the metal mounting brackets. Homeowners should perform a seasonal audit of their sensors to ensure that these environmental factors have not caused the units to shift or fail. If you notice persistent signal loss during peak summer months, it may be due to direct sunlight interference, which can overwhelm the infrared beam. Installing a small shade shroud over the receiving sensor can often resolve these phantom signal interruptions.
Diagnostic Checklist for Homeowners
When your garage door refuses to close and the wall button flashes, it is almost always a sensor communication failure. Before assuming the motor unit is damaged, follow this diagnostic sequence to save on unnecessary service calls. First, inspect the LED indicators on both the sending and receiving eyes. If one light is dark, verify that the wire connection at the opener terminal is secure and free of debris. Second, verify the mounting hardware. In older Los Angeles homes, vibrations from the door operating can cause mounting screws to loosen in drywall, leading to misalignment. Tighten all bracket screws before attempting to manually realign the sensors. Third, check the floor level. If your garage slab has shifted due to seismic activity or settling, the gap between the floor and the door may have changed, requiring you to adjust the mounting height to maintain the required six inch clearance.
Realistic Service and Safety Considerations
While many sensor issues are minor, safety should always be the priority. Never attempt to bypass or override the photo eye system with tape or electrical modifications. These safety features are designed to function as an integrated circuit with the motor logic board. Bypassing them converts a safety device into a liability and poses a significant risk to household members, especially children and pets who may not understand the mechanics of the door. When selecting replacement sensors, ensure that the new equipment is compatible with your specific motor brand. Many modern garage door openers use proprietary signal frequencies that are not cross compatible with generic aftermarket sensors. If you are struggling with intermittent performance, consult our Safety Inspections page to learn how professional tuning can extend the life of your entire system.
Decision Criteria for Repair versus Replacement
How do you know when a repair is no longer sufficient? Consider the age and condition of the entire opener system. If your sensors are more than fifteen years old, the internal components have likely degraded to the point where simple cleaning or alignment will no longer provide reliable performance. If your motor unit lacks modern encryption or advanced safety features, upgrading the entire system may be a more cost effective solution than replacing individual parts. Homeowners should consider a full system upgrade if the sensors require frequent calibration, if the motor exhibits loud grinding noises, or if the system frequently suffers from electronic glitches during power fluctuations. For a full evaluation of your system health, visit our Garage Door Repair portal to compare the cost of sensor maintenance against the long term reliability of a new motor installation. Investing in a robust, modern opener ensures your property remains protected against both mechanical failure and unauthorized access attempts.
Related articles
Need professional garage door service?
Repairs, replacements and maintenance across Los Angeles and the San Fernando Valley. Same-day service and free written estimates.