
How to Install a Garage Door Opener: Complete DIY Guide
Learn how to install a garage door opener with this comprehensive DIY guide for Los Angeles homeowners. Step-by-step instructions, safety tips, and expert advice.

Introduction: Taking Control of Your Garage Door Opener Installation
Learning how to install a garage door opener can seem daunting, but with the right guidance and preparation, many Los Angeles homeowners successfully complete this project themselves. Installing a garage door opener is one of the most rewarding DIY projects you can tackle, transforming your daily routine while adding convenience and security to your home. Whether you're upgrading an old unit or installing your first electric garage door opener, this comprehensive guide walks you through every step of the garage door opener installation process.
Before diving into your DIY garage door opener setup, it's important to understand that while this project is achievable for those with moderate mechanical skills, it requires careful attention to safety protocols and proper technique. Los Angeles homes come with unique considerations, from earthquake safety features to specific building codes that affect installation requirements. Throughout this guide, we'll cover everything from selecting the right opener type to the final safety checks that ensure your new system operates flawlessly.
The garage door opener installation steps we'll cover are designed to help you avoid common mistakes while ensuring a professional-quality result. From mounting garage door opener hardware to garage door opener wiring and programming, each phase of the installation builds upon the previous one. If at any point you feel uncomfortable with the complexity of the task, remember that professional Opener Installation services are always available to ensure the job is done safely and correctly.
Understanding Garage Door Opener Types and What You'll Need for Installation
Before you begin your garage door opener installation, you need to understand the different types of openers available and gather all necessary tools and materials. The type of opener you choose will affect both the installation process and the long-term performance of your garage door system.
Types of Garage Door Openers
There are three main types of garage door openers commonly installed in Los Angeles homes. Chain-drive openers are the most traditional and affordable option, using a metal chain to pull the door open and closed. These units are extremely durable and reliable, though they tend to be noisier than other options. They work well for detached garages where noise isn't a concern, and they're particularly suitable for heavier garage doors.
Belt-drive openers use a rubber belt instead of a chain, making them significantly quieter during operation. These are ideal for homes where the garage is attached and located beneath living spaces or bedrooms. While slightly more expensive than chain-drive models, the noise reduction makes them popular in residential neighborhoods throughout Southern California. They require similar installation procedures to chain-drive units but offer smoother, quieter operation.
Screw-drive openers use a threaded steel rod to move the door, with fewer moving parts than chain or belt systems. These openers require less maintenance and operate at moderate noise levels. They're particularly effective in Los Angeles's mild climate, as extreme temperature fluctuations can affect their performance. Modern Smart Openers often come in any of these drive types, adding WiFi connectivity and smartphone control to your garage door system.
Essential Tools and Materials for Installation
Proper preparation is crucial for a successful install garage door motor project. You'll need a comprehensive set of tools before beginning the installation process. Essential tools include a sturdy ladder tall enough to reach your garage ceiling safely, a power drill with various drill bits, adjustable wrenches, socket wrench sets, screwdrivers (both flathead and Phillips), a tape measure, a level, wire cutters and strippers, and safety glasses.
Beyond tools, verify that your garage door opener kit includes all necessary components. A complete kit should contain the motor unit, rail assembly, trolley and carriage, mounting brackets, chain or belt drive system, remote controls, wall-mounted control panel, all necessary hardware (bolts, nuts, lag screws), and detailed installation instructions. Some installations may require additional materials like electrical wire, wire nuts, or supplementary mounting brackets depending on your specific garage configuration.
Pro Tip: Before purchasing your opener, check the weight and dimensions of your garage door. Most residential openers are rated for doors up to 7 feet tall and weighing up to 200 pounds, but if you have an oversized or custom door, you'll need a heavy-duty model with appropriate horsepower. Los Angeles homes often feature custom garage doors that may require specialized equipment.
Understanding Your Garage Door's Compatibility
Not every garage door is ready for opener installation without modifications. Your door must be properly balanced and in good working condition before installing an opener. A door that's difficult to open manually or doesn't stay in place when partially opened indicates problems with the spring system that must be addressed first. If you notice these issues, professional Spring Replacement may be necessary before proceeding with opener installation.
Check that your door has a reinforcement strut if it's a sectional door, especially for wider single or double doors. This horizontal bar prevents the door from bending when the opener applies force to the center of the top section. Inspect the door's track alignment and ensure all rollers move smoothly without binding or scraping. Any issues with track alignment should be resolved through Track Repair services before mounting your new opener.
Pre-Installation Prep: Safety Checks and Measuring Your Los Angeles Garage
Thorough preparation and safety checks are the foundation of a successful garage door opener installation. Taking time to properly assess your garage space and existing door system prevents complications during installation and ensures optimal performance afterward.
Critical Safety Inspections Before Installation
Safety must be your primary concern when working with garage doors and openers. Begin by disconnecting power to any existing opener at the circuit breaker to prevent accidental activation during removal. Examine your garage door's spring system carefully but never attempt to adjust or remove torsion springs yourself, as they're under extreme tension and can cause serious injury. If your springs show signs of wear, rust, or damage, contact professionals before proceeding.
Test your garage door's balance by disconnecting any existing opener and manually lifting the door halfway. A properly balanced door should stay in place when released. If it falls or rises on its own, the spring tension needs adjustment before you install your new opener. An unbalanced door will cause premature wear on your new opener motor and may create safety hazards. This balance test is crucial for the longevity of your investment and is covered in detail in our guide on How to Balance Your Garage Door: A Step-by-Step Guide.
Inspect all door hardware including hinges, rollers, and cables. Look for signs of wear such as frayed cables, cracked rollers, or loose hinges. These components must be in excellent condition to support the added stress of an automatic opener system. Check that all mounting brackets are securely fastened and that there's no visible damage to door sections. Any compromised hardware should be replaced before installation begins.
Measuring and Planning Your Installation Space
Accurate measurements ensure your opener fits properly and operates safely within your garage space. Start by measuring the headroom, which is the distance from the top of your door opening to the ceiling. Most openers require at least 2 inches of headroom above the highest point of the door's travel, though some models need more. Measure the ceiling height at several points, as many Los Angeles garages have sloped ceilings that affect installation options.
Calculate the backroom, which is the distance from the garage door opening to the back wall of your garage. You'll need enough space for the full length of the rail system when the door is fully open. Standard garage door opener rail installation requires the rail to extend from above the door opening to a point above where the door rests when open, typically requiring 8 to 10 feet of clearance for standard residential doors.
Identify the location for mounting the opener motor unit. The motor should be positioned along the ceiling centerline of the garage door, typically 6 to 12 inches behind the fully opened door. Mark the center point of your door opening and use a chalk line or laser level to establish the centerline along your ceiling. Locate ceiling joists or rafters for secure mounting, as the opener unit must be attached to structural members, not just drywall or ceiling panels.
Electrical Requirements and Preparation
Most modern garage door openers require a standard 120-volt electrical outlet within 6 feet of the motor unit location. Inspect your garage to verify an outlet exists in the appropriate location. If no outlet is available, you'll need to have one installed by a licensed electrician before proceeding. Never use extension cords as a permanent power solution for garage door openers, as this creates fire hazards and violates electrical codes in Los Angeles and throughout California.
Plan the routing for your wall-mounted control panel wiring. The control panel typically mounts near the entry door to your home, within sight of the garage door but out of reach of small children. Most openers include low-voltage wire for this connection, but you'll need to determine the best path from the motor unit to the control panel location. Consider conduit or wire channels for a professional appearance and protection of the wiring.
Step-by-Step: Mounting the Opener and Installing the Rail System
With preparation complete, you're ready to begin the physical installation of your garage door opener. This phase requires patience and precision, as proper mounting and alignment are essential for smooth, reliable operation.
Assembling the Rail and Trolley System
Begin by assembling the rail system on the garage floor or a large worktable. Most garage door opener rail installation starts with connecting multiple rail sections that extend from the motor unit to the door attachment point. Follow the manufacturer's instructions carefully, as rail assembly varies between brands and models. The rail sections typically connect with bolts or locking mechanisms that must be tightened securely to prevent separation during operation.
Thread the chain or belt through the rail according to the instructions. This step requires attention to ensure the drive mechanism is properly oriented and tensioned. The trolley or carriage that attaches to the door should move smoothly along the entire length of the rail without binding. Install the chain or belt around the drive sprocket on the motor unit, ensuring it's properly seated in the grooves. Proper tension is critical; too loose and the opener will operate erratically, too tight and you'll experience premature wear and excessive noise.
Attach the trolley to the rail system and test its movement by hand. It should glide smoothly from one end of the rail to the other without resistance. The emergency release cord and handle should be installed at this stage, hanging down from the trolley so it's easily accessible when the door is closed. This safety feature allows manual operation if power fails or the opener malfunctions.
Installing the Header Bracket and Door Arm
The header bracket mounts to the top section of your garage door, providing the connection point between the door and the opener trolley. Locate the center point of your door's top section and mark the position for the header bracket. For sectional doors, the bracket should be mounted on the reinforcement strut if one is present. Use the hardware provided with your opener, ensuring bolts pass completely through the door section for maximum strength.
Attach the curved door arm to the header bracket using the pins and clips provided. The door arm should move freely at both connection points to accommodate the door's arc as it opens and closes. If the arm binds or doesn't articulate smoothly, the header bracket position may need adjustment. This connection experiences significant force during operation, so double-check that all fasteners are tight and properly installed.
Mounting the Motor Unit to the Ceiling
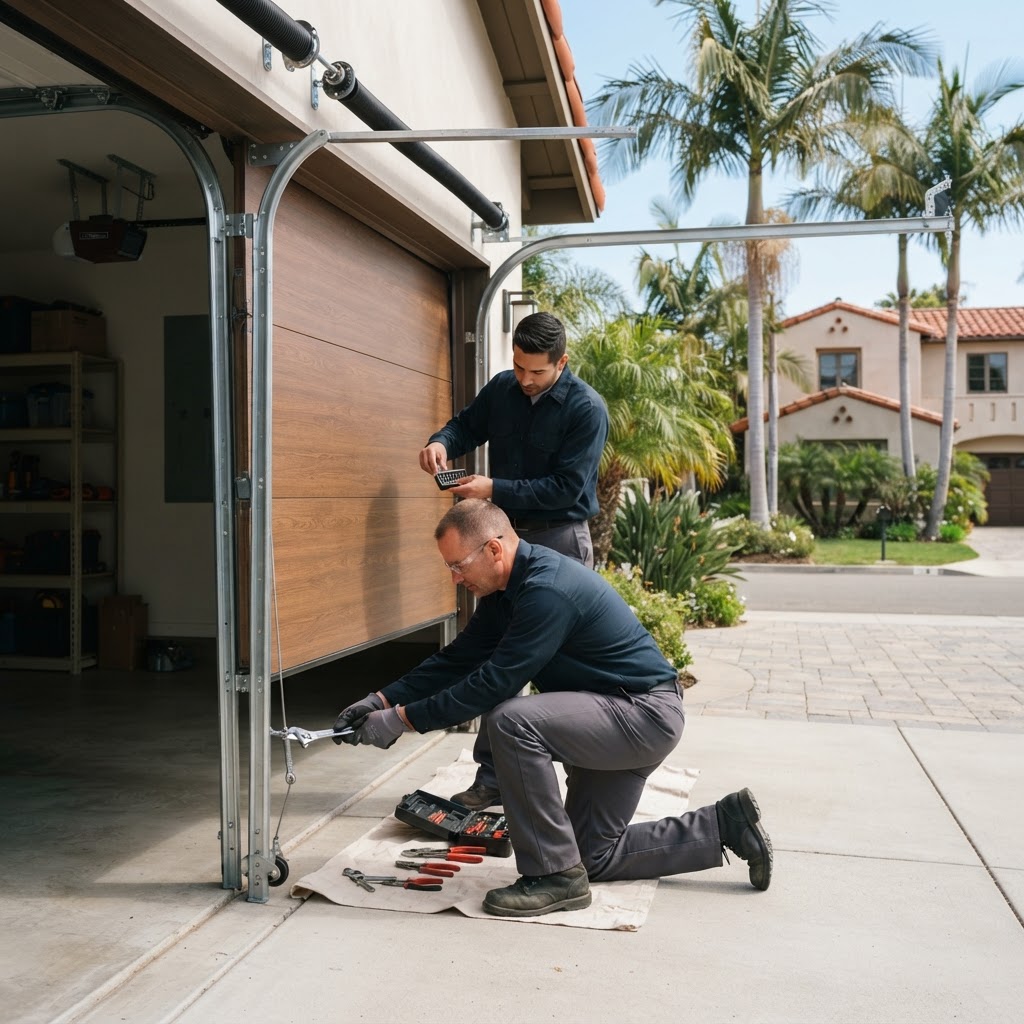
With the rail assembly complete, you're ready to mount the motor unit. This is typically a two-person job, as the assembled unit is heavy and awkward to position. Lift the motor unit and rail assembly into position, aligning the rail with the centerline you marked earlier. The front of the rail should be positioned directly above the center of the door when closed, typically 2 to 3 inches from the door face.
Support the motor unit temporarily while you install the mounting bracket. Most openers include a metal bracket that attaches to ceiling joists or rafters and supports the motor unit. Use lag screws to secure the mounting bracket to structural members, never just to drywall or thin ceiling material. If your ceiling joists run perpendicular to the door, you may need to install a support board across multiple joists to provide a solid mounting surface.
Once the motor unit is secured, check the rail alignment using a level. The rail should be level or have a slight upward slope toward the motor unit, never sloping down. Adjust the hanging brackets or mounting hardware as needed to achieve proper alignment. Some installations require additional hanging straps or brackets to support the rail at intermediate points, especially for longer rail systems or heavier doors.
Connecting the Door Arm to the Trolley
With the motor unit securely mounted, connect the straight section of the door arm to the trolley. This connection completes the mechanical link between the opener and your door. Ensure the door is in the closed position when making this connection. The arm should attach without forcing the door up or down; if adjustment is needed, the trolley position can be moved slightly along the rail.
Test the mechanical connection by manually moving the trolley along the rail. The door should open and close smoothly as the trolley moves. Watch for any binding, misalignment, or resistance. The door should follow the natural arc of its track system without the opener forcing it into an unnatural path. If you notice issues, the rail position or angle may need adjustment before proceeding to electrical connections.
Wiring and Programming Your Garage Door Opener Safely
With the mechanical installation complete, you'll now connect the electrical components and program your new opener. This phase requires careful attention to safety and proper procedures to ensure reliable operation.
Electrical Connections and Safety Sensors
Before making any electrical connections, verify that power to the area is turned off at the circuit breaker. Modern garage door openers include safety sensors that mount near the floor on either side of the door opening. These photoelectric sensors create an invisible beam across the door opening; if anything breaks the beam while the door is closing, the opener immediately reverses direction to prevent injury or damage.
Mount the sensor brackets approximately 4 to 6 inches above the garage floor, one on each side of the door opening. The sensors must face each other directly, with the beam path clear of any obstructions. Use a level to ensure both sensors are at exactly the same height, as misalignment prevents proper operation. Secure the brackets to the door track or wall studs, ensuring they're mounted firmly and won't shift during door operation.
Run the sensor wires from each unit back to the motor unit, following the door track and securing the wires with staples or wire clips. Keep sensor wires away from moving parts and electrical conduits that might cause interference. Connect the wires to the appropriate terminals on the motor unit according to the color coding in your installation manual. Most systems use white and black or white and gray wire pairs for the sensors.
Installing the Wall Control Panel
The wall-mounted control panel provides convenient interior access to your garage door opener and typically includes the light switch, lock button, and door position indicator. Choose a location near your entry door that provides a clear view of the garage door but is high enough that small children cannot reach it, typically about 5 feet above the floor.
Run the low-voltage wire from the motor unit to the control panel location. This wire typically has two conductors and connects to specific terminals on both the motor unit and control panel. Strip approximately 1/4 inch of insulation from each wire end and secure them to the terminal screws, ensuring tight connections. Mount the control panel to the wall using the provided screws, making sure it's level and securely attached.
Programming Remotes and Keypad Access
Modern garage door openers use rolling code technology that changes the access code each time the remote is used, preventing unauthorized access. Programming remotes typically involves pressing a "learn" button on the motor unit, then pressing the button on the remote you wish to program. The motor unit will flash or beep to confirm successful programming. Repeat this process for each remote control you want to use with the system.
If your opener includes a wireless keypad for exterior access, mount it near your garage door at a convenient height. These keypads allow entry using a personal identification number, eliminating the need to carry a remote. Follow the manufacturer's instructions to program your PIN code and sync the keypad with the motor unit. Choose a code that's easy to remember but not obvious, avoiding sequences like 1234 or your house number.
Many newer openers integrate with smartphone apps and home automation systems. If you're installing a smart garage door opener, download the manufacturer's app and follow the setup wizard to connect the opener to your home WiFi network. These systems offer convenient features like remote monitoring, automatic closing schedules, and notifications when the door opens or closes. For more information on smart technology integration, visit our Smart Openers page.
Initial Power-Up and System Check
With all electrical connections complete, restore power at the circuit breaker and plug the opener into the electrical outlet. The motor unit should power up, typically indicated by lights on the unit or control panel. Check that the safety sensors are functioning by observing the indicator lights on each sensor; they should be lit steadily, not blinking, which indicates proper alignment and communication.
Test the safety sensor function before operating the door. Start closing the door using the wall control, then wave your hand through the sensor beam. The door should immediately stop and reverse direction. If the door doesn't reverse, recheck the sensor alignment and wiring connections. Never bypass or disable safety sensors, as they're critical safety features required by law and essential for preventing injuries.
Testing, Adjusting Force Settings, and Final Safety Checks
The final phase of your garage door opener installation involves careful testing and adjustment to ensure safe, reliable operation. These steps are crucial for both performance and safety, protecting your family and property from potential hazards.
Adjusting Travel Limits and Door Position
Travel limits control how far the door opens and closes. Improperly set limits can cause the door to not close completely or to reverse unnecessarily when closing. Most modern openers have adjustment controls on the motor unit, typically labeled as "up limit" and "down limit." Some models use dial adjustments, while others use push buttons that you hold to move the limits incrementally.
To set the closed position, press the close button on the wall control and observe where the door stops. The door should rest fully closed against the floor with the weather seal compressed slightly. If the door stops before reaching the floor, increase the down travel limit. If the door presses too hard against the floor or the motor continues to run after the door is fully closed, decrease the down travel limit.
For the open position, the door should open completely, with the bottom section level with or slightly above the header. If the door doesn't open far enough, increase the up travel limit. If the door tries to open beyond the fully open position, causing the motor to strain or the door to jerk, decrease the up travel limit. Make small adjustments and test after each change, as limit settings can be sensitive.
Setting Force Adjustments for Safe Operation
Force settings determine how much power the opener applies when opening and closing the door. These settings are critical safety features that prevent injury or damage if the door encounters an obstruction. Most openers have separate force adjustments for opening and closing, typically accessed through dials or buttons on the motor unit.
Start with the force settings at mid-range and test the door operation. The door should move smoothly through its full travel without straining or hesitating. To test the closing force, place a 2x4 board flat on the floor in the door's path. When the door contacts the board, it should immediately reverse direction. If the door pushes the board or doesn't reverse quickly, decrease the closing force setting.
Test the opening force by manually resisting the door as it opens. The door should stop if you apply moderate downward pressure. If the door continues to push against resistance, decrease the opening force. Proper force settings ensure that the door will stop or reverse if it encounters a person, pet, or object, preventing injuries and damage. These adjustments may need periodic refinement as weather conditions change or the door settles into regular operation patterns.
Comprehensive Safety Testing Protocol
Conduct a complete safety test sequence before considering your installation complete. This protocol verifies that all safety features function correctly and that the door operates reliably under various conditions. Start by testing the emergency release mechanism. Pull the release handle and manually move the door up and down. It should move smoothly without the opener engaging. Re-engage the trolley and verify that the opener takes control of the door again.
Perform multiple open and close cycles, watching and listening for any unusual sounds, vibrations, or hesitations. The door should move smoothly and quietly through its full range of motion. Pay attention to the door's speed; it should move at a consistent pace without sudden accelerations or decelerations. If you notice jerky motion or unusual sounds, check all mechanical connections and verify that the chain or belt tension is correct.
Test the auto-reverse function multiple times using different objects in the door's path. The door should reverse immediately upon contact with any obstruction. Also test the photoelectric sensors by breaking the beam while the door is closing; the door should reverse instantly without touching the obstruction. These safety features are your primary protection against injuries and must function reliably every time.
Pro Tip: After installation, test your garage door opener monthly by placing a 2x4 board under the door and verifying that it reverses upon contact. Also check that the photoelectric sensors stop the door when the beam is broken. Regular testing ensures these critical safety features remain functional, protecting your family and pets from potential harm.
Final Adjustments and Documentation
Make any final adjustments needed based on your testing. Fine-tune the travel limits, force settings, and sensor alignment until the door operates perfectly. Lubricate all moving parts including the chain or belt, door rollers, hinges, and springs using a silicone-based lubricant designed for garage doors. Proper lubrication reduces noise and wear, extending the life of your opener and door components. For detailed lubrication procedures, refer to our guide on How to Lubricate Your Garage Door: Complete Guide.
Document your installation by saving all manuals, warranty information, and receipts in a safe place. Note the date of installation and any specific settings or adjustments you made. This information will be valuable for future maintenance, troubleshooting, or warranty claims. Take photos of the installation, including the model number and serial number of your opener, for easy reference.
Schedule a follow-up inspection after two weeks of regular use. Check all mounting hardware to ensure nothing has loosened during the break-in period. Verify that force settings and travel limits haven't drifted from your initial adjustments. This follow-up ensures your installation remains safe and properly adjusted as components settle into regular operation.
When to Call a Professional: Complex Installations in LA Homes
While many homeowners successfully complete garage door opener installations themselves, certain situations require professional expertise. Recognizing when to call a professional protects your safety, prevents damage to your property, and ensures code compliance in Los Angeles and throughout Southern California.
Situations That Require Professional Installation
If your garage door has torsion springs that need adjustment or replacement, stop and call a professional immediately. Torsion springs are under extreme tension and can cause severe injuries or death if mishandled. Only trained technicians with specialized tools should work on these components. Similarly, if you discover broken or damaged springs during your pre-installation inspection, professional Spring Replacement is necessary before proceeding with opener installation.
Electrical work beyond simple plug-in connections should be handled by licensed electricians. If your garage lacks an appropriate outlet near the opener location, or if you want to install dedicated circuits or upgrade your electrical panel, hire a qualified electrician. Los Angeles building codes have specific requirements for garage electrical systems, and improper wiring creates fire hazards and liability issues. Professional electricians ensure your installation meets all local codes and safety standards.
Homes with unusual garage configurations present challenges that may exceed DIY capabilities. Cathedral ceilings, limited headroom, off-center doors, or unusual door sizes often require specialized mounting solutions and equipment. If your garage has structural issues like sagging ceiling joists, deteriorating rafters, or inadequate support for the opener weight, consult a professional before proceeding. These structural concerns must be addressed to ensure safe, reliable opener operation.
Complex Door Types and Custom Installations
Custom or high-end garage doors often require professional installation to protect warranties and ensure proper operation. Carriage-house style doors, wood doors, and heavy custom designs may need specialized opener configurations that differ from standard installations. Many manufacturers require professional installation for warranty coverage on premium door and opener systems.
If you're installing an opener on a door that's part of a Garage Door Installation project, coordinating the opener installation with the door installation ensures optimal compatibility and performance. Professional installers can verify that the door is properly balanced, adjusted, and ready for opener installation before beginning the work. This coordination prevents issues that arise when openers are installed on improperly set up doors.
Commercial Applications and Heavy-Duty Systems
Commercial garage doors and heavy-duty residential applications require professional installation. These systems involve larger, heavier doors with more powerful openers and complex control systems. Commercial installations must comply with additional safety requirements and building codes that differ from residential standards. If you need Commercial Doors service, professional installation ensures compliance with all applicable regulations and safety requirements.
Three-phase power systems, backup battery systems, and integration with commercial access control systems exceed the scope of typical DIY installations. These complex systems require expertise in electrical systems, programming, and commercial door operation. Professional installers have the training, tools, and experience to handle these sophisticated installations safely and efficiently.
Signs You Need Professional Help During Installation
Even if you start your installation confidently, certain issues indicate you should stop and call a professional. If you discover structural problems with your ceiling or garage framework, don't attempt to proceed. Inadequate structural support can lead to opener failure, property damage, or injuries. If you encounter electrical issues like insufficient power, improper grounding, or wiring problems, stop and consult an electrician.
When the door doesn't operate smoothly after installation despite multiple adjustments, underlying problems with the door system may exist. Issues with track alignment, spring tension, or door balance require professional diagnosis and correction. Attempting to compensate for these problems through opener adjustments leads to premature wear and potential safety hazards.
If you're uncomfortable with any aspect of the installation, trust your instincts and call for help. Professional Opener Installation services provide peace of mind that the job is done correctly and safely. Technicians can also identify potential problems you might miss and ensure your installation complies with all local requirements.
Professional Services Throughout Los Angeles
MSB Garage Door Repair serves homeowners throughout Los Angeles and surrounding communities, providing expert garage door opener installation and repair services. Whether you need assistance completing a DIY installation, want professional installation from the start, or require troubleshooting for an existing opener, experienced technicians are available to help. Service areas include Burbank Service Area, Glendale Service Area, and communities throughout Southern California.
Professional installation includes proper sizing and selection of the opener for your specific door, complete mechanical and electrical installation, adjustment of all settings for optimal performance, comprehensive safety testing, and instruction on proper operation and maintenance. Technicians bring specialized tools and equipment that ensure precise installation and can address unexpected challenges that arise during the process.
Conclusion: Enjoy Your New Garage Door Opener
Successfully installing a garage door opener is a significant accomplishment that adds convenience, security, and value to your Los Angeles home. By following the comprehensive steps outlined in this guide, from understanding opener types and preparing your garage to mounting the system and conducting thorough safety tests, you've transformed your garage door from a manual operation to an automated system that serves your family for years to come.
Remember that proper installation is just the beginning of your garage door opener's life. Regular maintenance, including monthly safety tests, periodic lubrication, and annual inspections, keeps your system operating safely and reliably. Pay attention to any changes in operation, unusual sounds, or inconsistent performance, as these may indicate adjustment needs or developing problems that should be addressed promptly.
The knowledge you've gained through this DIY garage door opener setup process helps you understand your system better, enabling you to perform basic troubleshooting and maintenance. However, never hesitate to seek professional assistance for issues beyond your comfort level or expertise. Complex repairs, spring adjustments, and electrical problems should always be handled by trained technicians who have the proper tools and experience.
Your garage door opener is a sophisticated system that combines mechanical, electrical, and electronic components working together seamlessly. Proper installation ensures these components function harmoniously, providing years of reliable service. Whether you completed the installation yourself or called professionals partway through, you now have a fully functional automated garage door system that enhances your daily life.
If you encountered challenges during your installation, need professional assistance with adjustments, or want expert verification that your installation meets all safety standards, MSB Garage Door Repair is here to help. Our experienced technicians serve homeowners throughout Los Angeles, providing comprehensive garage door services from installation to maintenance and repair.
Need professional help with your garage door opener installation or have questions about your DIY project? Contact MSB Garage Door Repair at (818) 650-7697 or book a service appointment online. Our experienced technicians provide expert installation, adjustment, and repair services throughout Los Angeles and Southern California, ensuring your garage door opener operates safely and reliably for years to come.
Related articles


Need professional garage door service?
Repairs, replacements and maintenance across Los Angeles and the San Fernando Valley. Same-day service and free written estimates.